

Step 1
Identify the roof vent locations toward the rear or sides of the home. Space vents evenly across the width of the roof.
Step 2
Before cutting any openings, mark all vent locations. Holes should be centered between rafters and positioned 24 inches down from the roof peak. When installing the vent as an intake, place it 24 inches up from the eave or roof edge. Make sure attic insulation does not obstruct the intake opening.
Step 3
Cut an opening measuring 11 inches high by 10 inches wide. Do not cut the roof opening larger than the vent’s bottom opening.
Step 4
Install shingles up to the point where they cover the lower edge of the opening, then trim away excess material. Since shingles are part of a porous roofing system, apply an approved sealant around the perimeter of the opening.
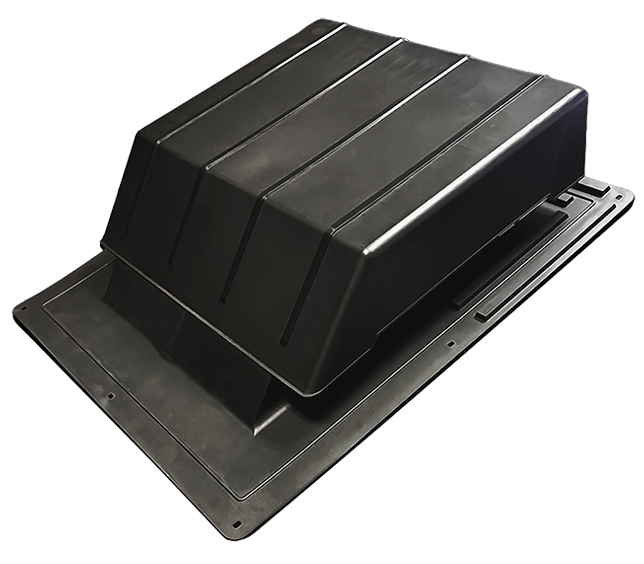
Step 5
The top of the Slant Back Vent is angled. Be sure the vent is installed with the slanted peak facing upward.
Step 6
Attach the vent base using at least eight galvanized nails. Nails must be a minimum of 1¼ inches long and penetrate the vent, shingles, and roof decking. Place one nail in each corner of the flashing and one centered along each side.
Step 7
For watertight seal, use a roofing sealant that is safe for plastic materials. Apply a small amount of sealant over each nail head.8. Shingle up and around the vent ensuring that the shingles butt up against the throat of the vent.
Step 8
Continue shingling up and around the vent, ensuring the shingles fit snugly against the vent throat.
Step 9
Cut the top shingle to match the slope of the vent, secure it in place, and continue shingling normally to finish the installation.