
Step 1
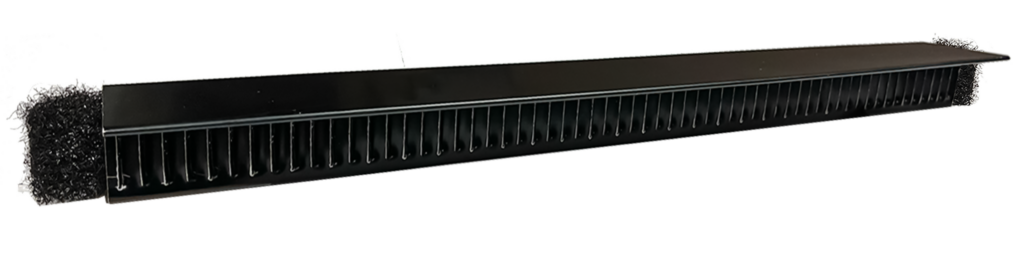
Step 1: The Standing Seam Vent comes in several sizes to fit different metal panels. Simple to put together.Made with a special nonwoven fabric that won’t wear out over time. The SSV has a strip of Marco’s own Weather-Tite™ non-woven material added to each vent that will protects it better from the weather. At the bottom of the vent, there are holes for fasteners and butyl tape that have already been put there. Superior Net Free Area: 18 square inches per linear foot. Keeps bugs, dampness, and other things out.
Step 2
Step 2: Peel away the backing from the butyl tape. Allow the over-stuffed foam to expand so it completely fills the gap between the top of the rib and the SSV. Align the SSV along the chalk line.
Step 3
Step 3: Secure the SSV
using type 410 fasteners,
ensuring at least one-half inch of penetration into the decking. Space the fasteners no more than three inches apart.
Step 4
Step 4: Apply sealant at the points where the SSV meets the panel ribs.
Step 5
Step 5: Install the open hem ridge cap by locking both bottom sides over the top and side of the SSV. Secure and finish installing the ridge cap by following the steel manufacturer’s installation instructions and detail.