


Step 1
Remove ridge cap shingles from the entire length of the ridge. NOTE: Skip step 1 for new construction.
Step 2
Snap chalk line on both sides of the ridges and no more than ¾” from the peak.
Step 3
Cut along both chalk lines. Remove roof sheathing. NOTE: Slots should not be cut any closer than within 12” of the gable end, hip, or intersecting ridge.
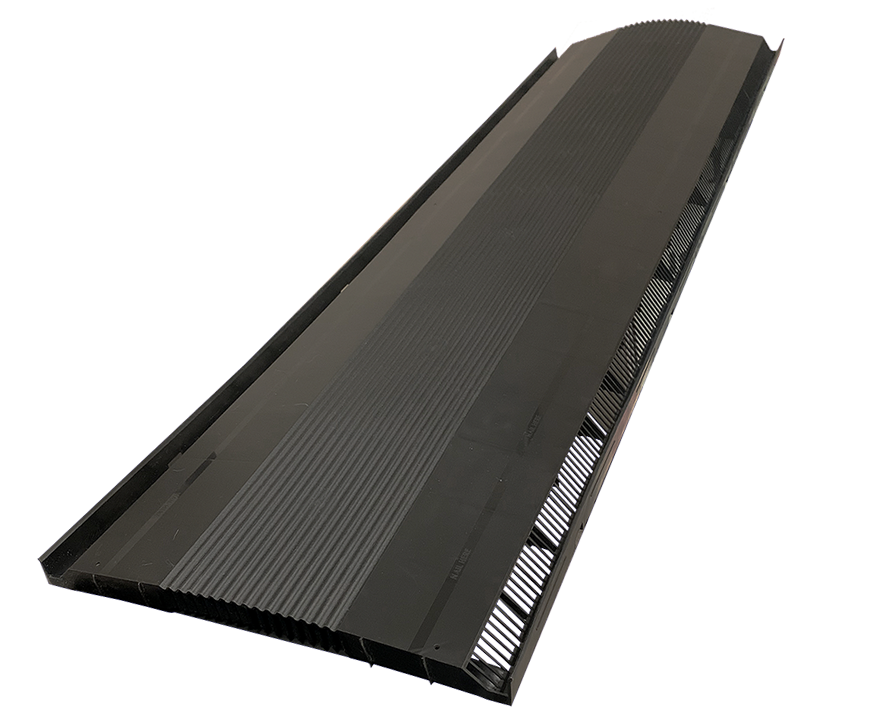
Step 4
It is recommended that the vent be installed the entire length of the ridge to ensure blending with the roof line. Position the first piece at one end of the ridge. Using 3” nails, for ¾” roof penetration or penetration through the deck, whichever is less, anchor vent through preformed nail holes.
Step 5
Nail each additional section in the same manner until the entire ridge is covered. A chalk line may be utilized to ensure vent alignment. Cut the last piece to length and install with original uncut end to the outside.
Step 6
Install a new ridge cap using 3” roofing nails, for ¾” deck penetration or penetration through the deck, whichever is less. Nai the ridge caps through the vent along the nail line to secure the vent. Shingle may need to be trimmed.
Step 7
Ridge-to-ridge application requires a mitre-cut to maintain continuous ridge line appearance.
IMPORTANT INSTALLATION NOTES:
- Python Pro Ridge Vent must always be installed with soffit vents of equal or slightly greater area.
- When installing Python Pro Ridge Vents, all other vent openings (except soffits) should be closed off.
- The slot cut in the roof ridge should only be cut no closer than 12” from any junction point, such as intersecting roofing ridge, chimney, gable, or other obstruction.
- Install the vent over the entire length of the ridge.
- Do not overdrive fasteners.